

You can get your course set up and running on Kritik within a few minutes. In this article, we will take you through each step in detail that makes your Course and Activity ready to use by your students.
Setting up your course on Kritik
Getting started with Kritik can be quick and easy so you can begin utilizing Kritik and its features promptly. Let us help you get started:
Step 1: Create your Kritik account
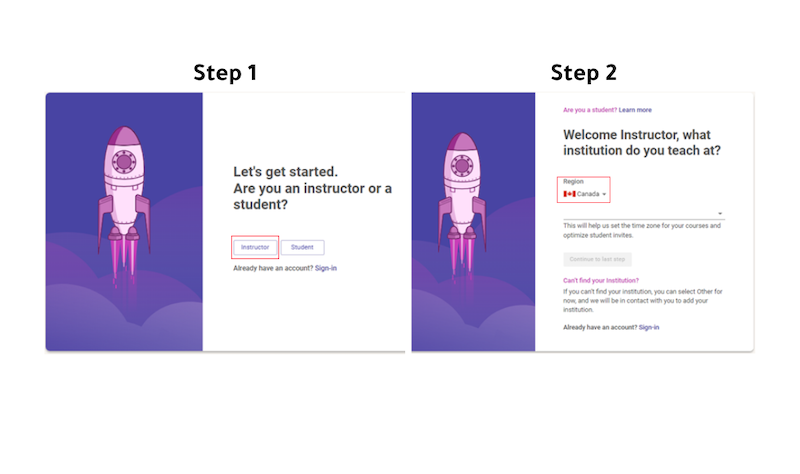
Sign in to your Kritik account by selecting your role as an ‘Instructor’ and then choosing your ‘Country’. You can then set up your account information with your ‘Faculty Email’ and ‘Password’.
Step 2: Set up your course

When you are ready to get started, click on the ‘+New Course’ box to start filling in the details for your course. Details include:
- New course name
- Course Code
- [Optional] Course Section
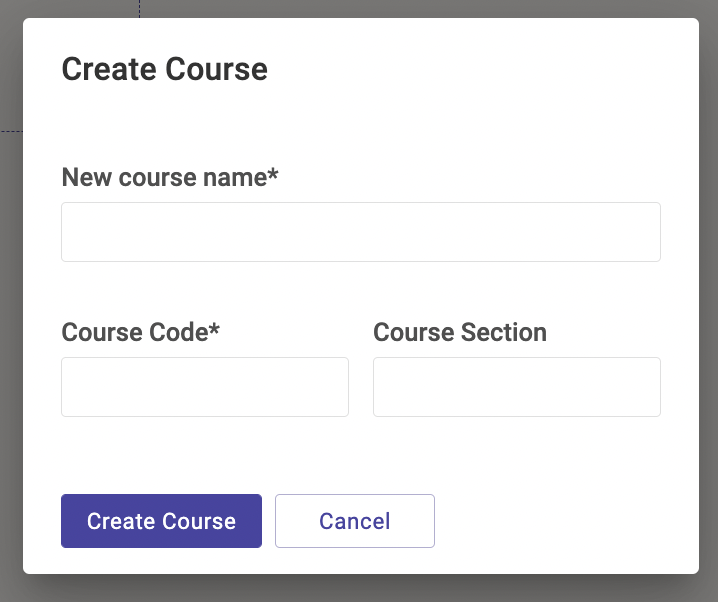
Once you’ve completed filling in all the information, hit the ‘Create Course’ button.
Step 3: Follow the product tour

Once you enter your newly created course, you will be greeted with a Product Tour. The Product Tour will guide you along the different features on the Kritik dashboard and some additional tips that will help you set up your course for success.
Step 4: Adjust your course settings and course scoring options
Navigate to the Course Info page on the left navigation bar. On this page, you have the ability to edit your course settings including:
- Course code, course name, and department (subject)
- Description of your course and syllabus
- Course length
- Late submission options
- Student permissions
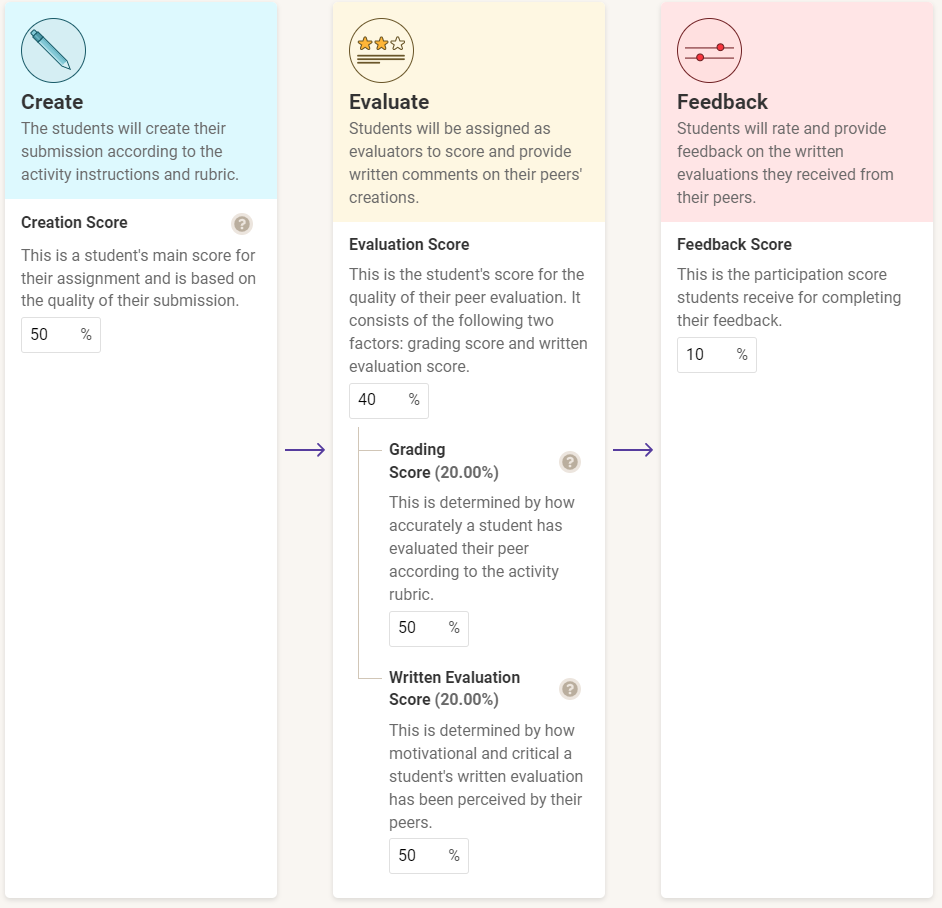
On the Course Info page, you will also be able to Invite Collaborators and Edit Scoring. If you select ‘Edit Scoring’ can choose how much each stage of each assignment will be weighted.
We recommend using a 50%/40%/10% breakdown to ensure students understand the importance of their participation in each stage and stay engaged in the content they are learning within Kritik.
Our Instructional Designer will help you with your Kritik onboarding and go over the following items:
- Activity creation
- Initial rubric
- Activity scheduling
- Inviting students
Step 5: Create your first activity
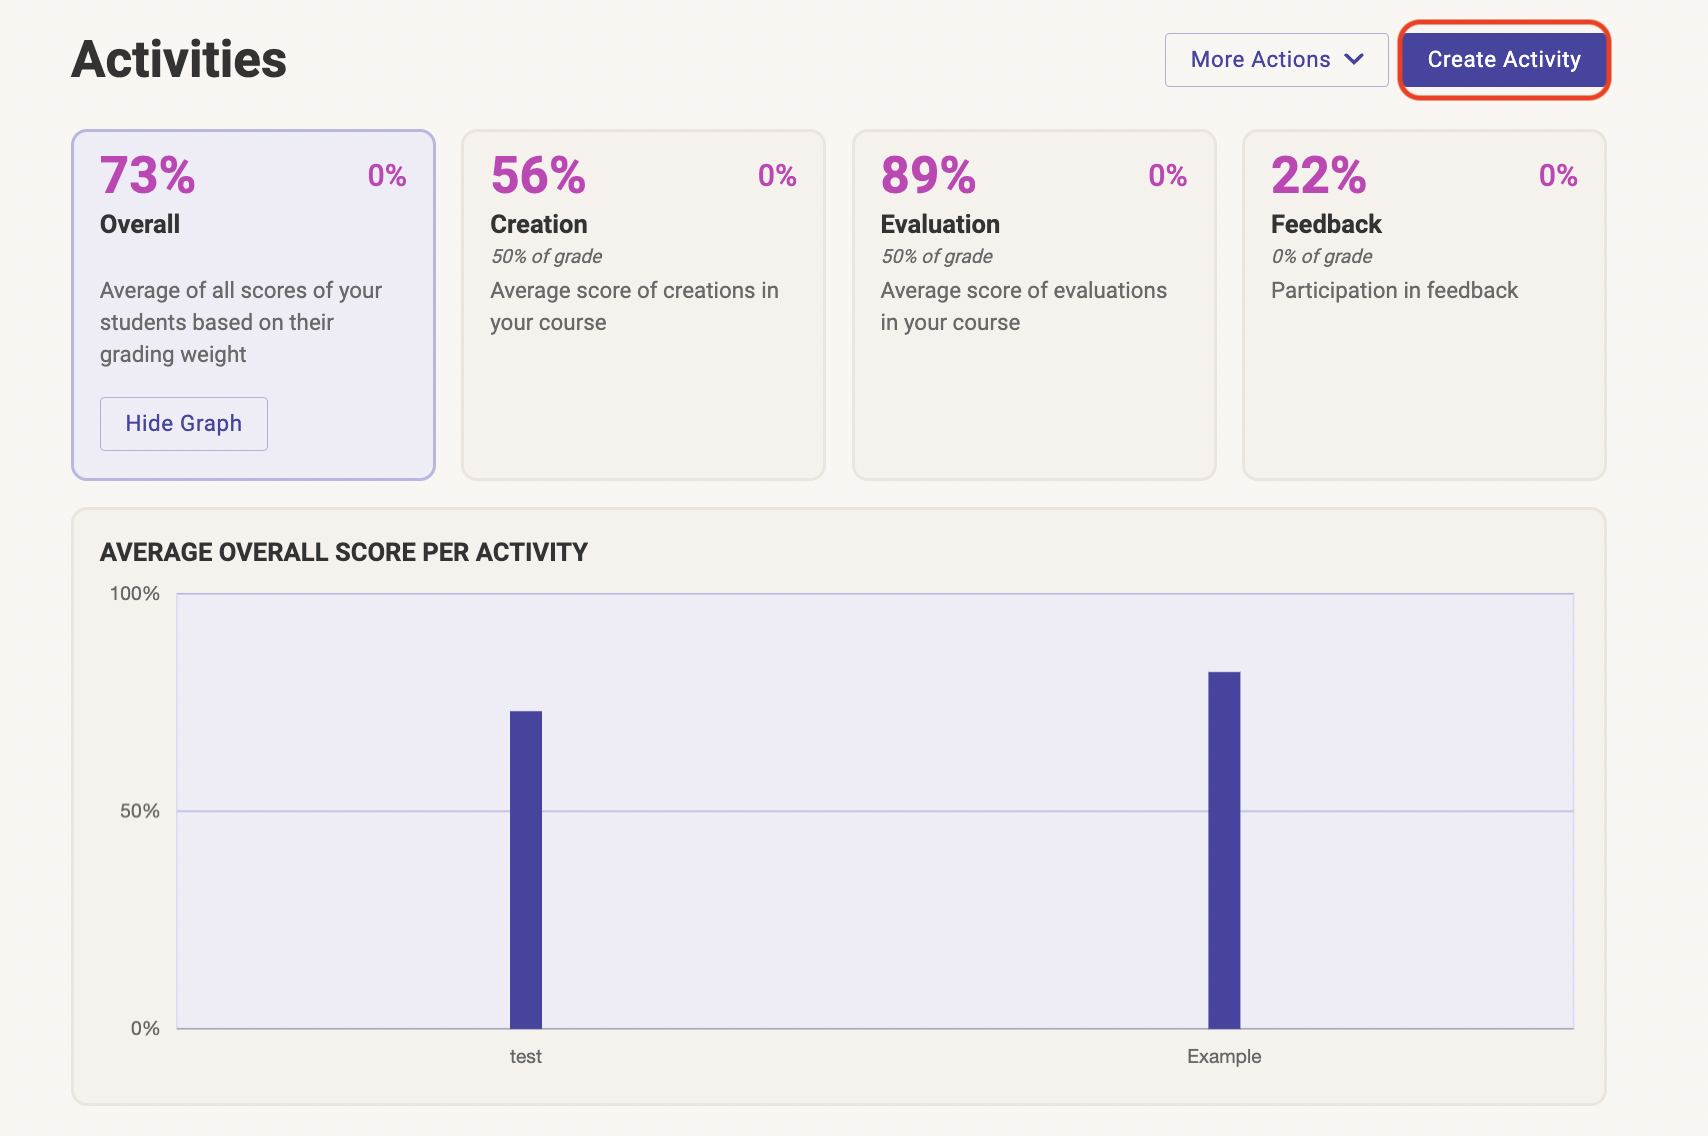
Click on the ‘Create Activity’ icon on the top right corner of your screen to select the type of activity you want to set up. Kritik allows you to choose between Individual, Group or Calibration.
Once you have selected the type of activity, you can set the number of evaluations for your students. We recommend 3-5 evaluations for reach activity.
Pro Tip: Using the Groups feature is a great way to facilitate effective team-based learning, helping students learn to collaborate at a higher level.
Step 6: Set up your rubric
Providing your students with explicit expectations from the start is important in learning as it helps students be effective in their approach. On Kritik, you can choose from a large repository of rubric templates that can be customized as per your needs.
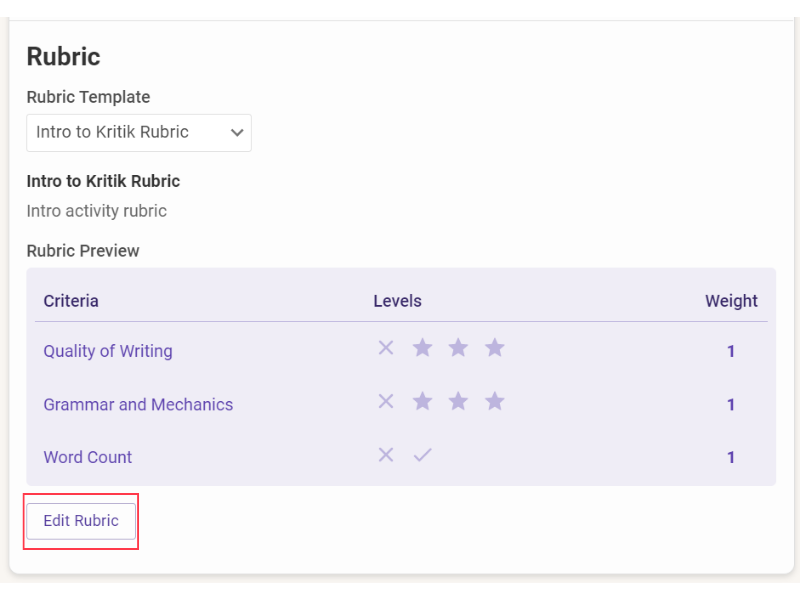
During the activity set up process, you will be prompted to build your rubric. By selecting ‘Edit Rubric’ you can add the criteria, increase or decrease the levels, and modify the weights assigned to each rubric.
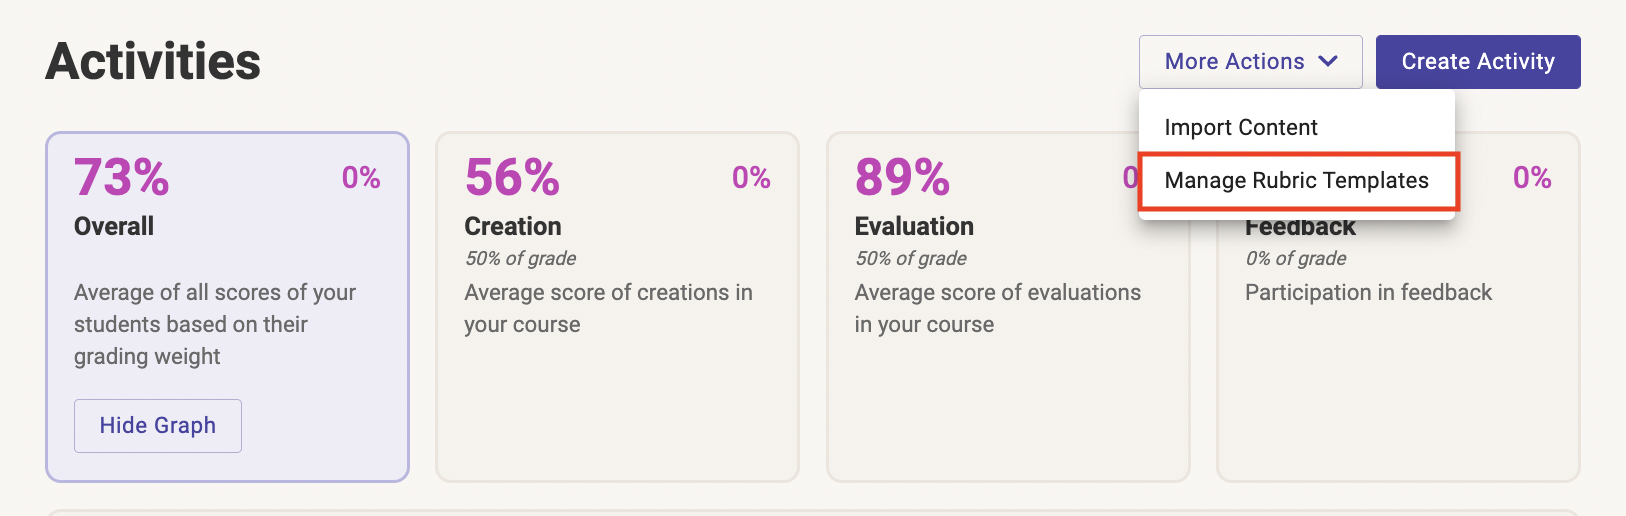
You can create new custom rubrics for each activity, and manage all of your templates by clicking on the ‘More Actions’ dropdown on the Activities page and selecting ‘Manage Rubric Templates’.
Step 7: Schedule your activity
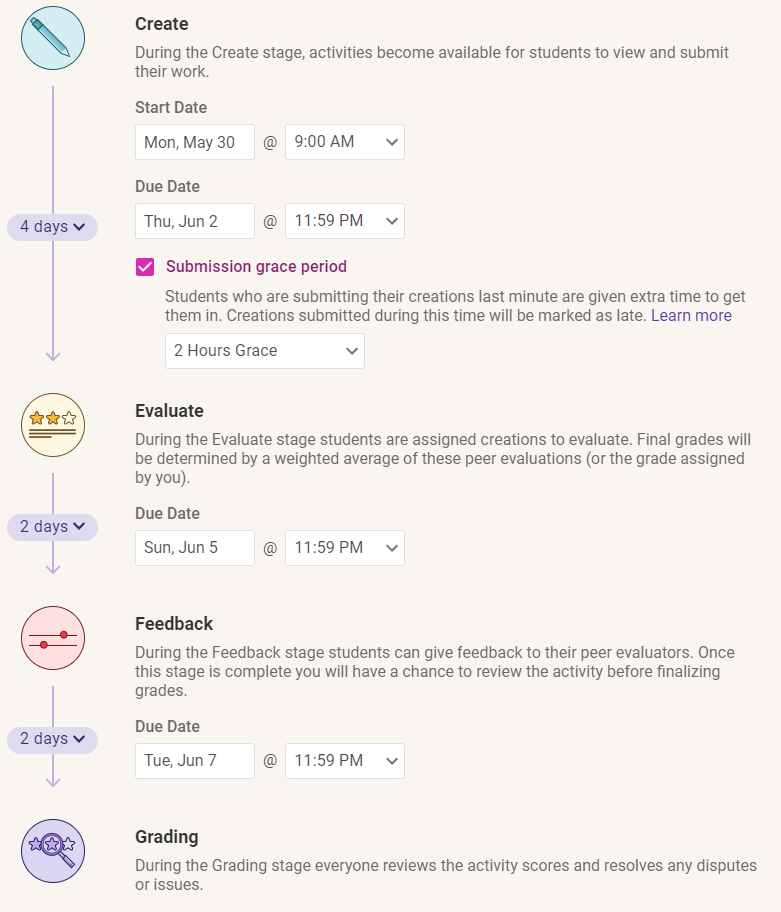
When scheduling your activity for your course on Kritik, be sure to set clear expectations with your students.
For example, short answers or discussion posts could be scheduled as 3 days for the Creation stage, 3 days for the Evaluation stage, and 1 day for the feedback stage, enabling you to complete the activity in a week’s time. There are also options to experiment with late submissions as well as having grace periods.
Step 8: Invite students

Now that you have created and scheduled your first activity, it’s time to start inviting your students by clicking on the ‘Invite Students’ option on the top right corner. Enter your students’ email addresses, separated by a comma and click on ‘Send Invite Emails.’ Your students will receive invitations to enrol via email with instructions to access the course.
3 Features on Kritik to get you started
Now that your course is set up on Kritik, we want to introduce you to some features that will help you get the best out of the platform. Learn about the following features to ensure success on Kritik!
1. Intro to Kritik Activity
The Intro to Kritik Activity is a short, pre-made activity in your course that helps make Kritik a smooth adoption for both the instructor and students. The activity is used to familiarize your students with the 3 stages of Kritik (Create, Evaluate, Feedback) and to get them thinking about the importance of feedback.
Learn how to use the Intro to Kritik Activity.
2. Calibration Activity
Calibration is a key feature of Kritik that aligns student grades to the way you would grade. These activities are especially ideal for the beginning of the semester as they only have one stage: Evaluation. This means students are not required to upload a creation or feedback but allows them to get familiarized with how to give effective and meaningful feedback.
For example, you could upload three creations from past submissions: one that’s great quality, one that is mediocre, and one that is not ideal. Based on how close a student grades the calibrations, Kritik’s system will align their grading with yours. This gives students a basis of how much grading power they hold when evaluating their peers throughout the semester.
As students complete assignments throughout the semester, students will continue to become better evaluators and their grading power will adjust accordingly.
3. Spotlighted Content

The Spotlight feature can be used throughout your semester to ensure students know the quality of work that is expected of them. By ‘Spotlighting’ a student’s creation and elaborating on what was done well and why it is a great example, your students can learn and apply the feedback to their next assessment.
3 Tips on getting started with Kritik
1. Introduce Kritik to your students as a peer learning platform
It is important to share with your students why you are using a new technology platform in the classroom. The ability to explain why to your students and have discussions about how to provide effective peer feedback can be the catalyst to a student’s success.
We have created resources that you can use to help introduce Kritik to your students.
2. Share the Student Guide with your students
Our Help Centre Student Guide is built to support students in their experience with Kritik. We recommend sharing this resource with your students at the beginning of the semester to get them equipped adequately.
3. Clear and concise Learning Objectives
When designing your assignment and establishing goals, using a measurable and quantifiable objective, you can help students understand what is expected of them. You should use actionable verbs from Bloom’s Taxonomy as a guide to get started.
Need additional support?
Kritik Customer Support
Our 24/7 Live Chat Support Team is available for both students and instructors who need help with using the platform or have any questions. With an average response time of 1 minute and 30 seconds. Located at the bottom right of any page on the Kritik website or your dashboard, select the purple chat button and send your questions.
Kritik Office Hours
Still have more questions? Attend our virtual office hours! Our team has 4 hours on separate days dedicated to helping Kritik professors get the best out of the platform.
Implement peer assessment right away with Kritik!
Getting started on new technology can be a learning curve and our team is here to help you adopt Kritik smoothly and quickly. With a few easy steps, tips, and Kritik support you can get your course set up in no time!
Schedule a demo with Kritik today to implement tech-enabled peer assessment in your courses that foster critical thinking skills among students.

